How to add/edit/delete product on model?
Admin User can add the solutions (products on model) from the backend of application. Solutions represent the products on the real model. By choosing Solutions from the main menu on the frontend, customers can see all solutions.

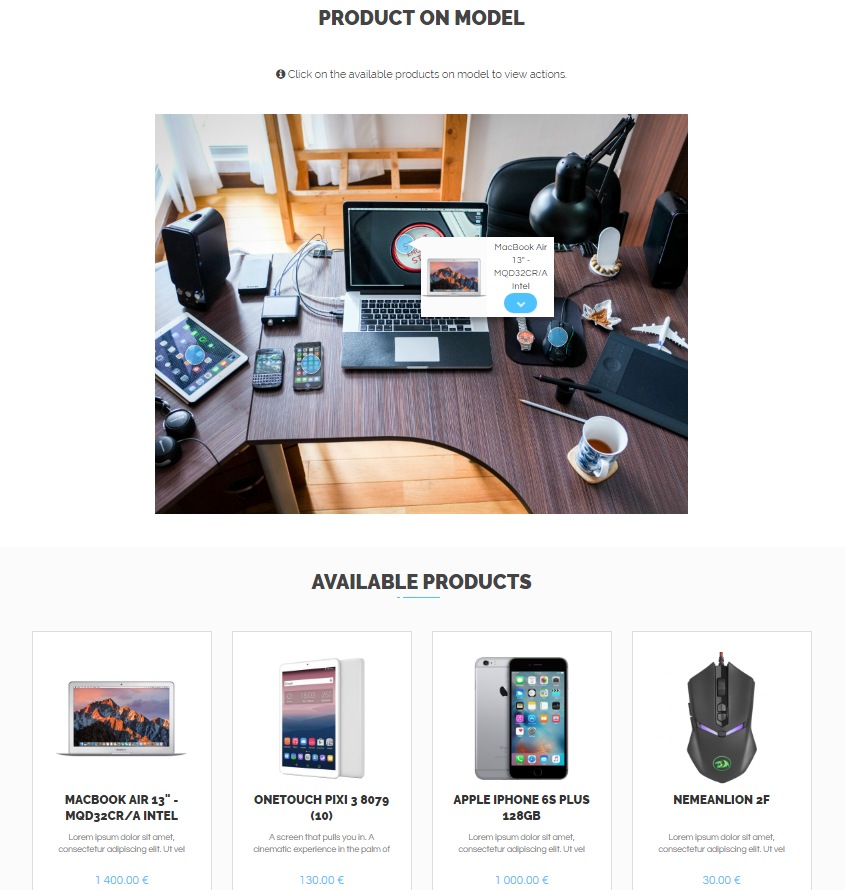
By clicking on the arrow, there are products that are tagged on that model, and customer has an option to open each of them by clicking on their images.
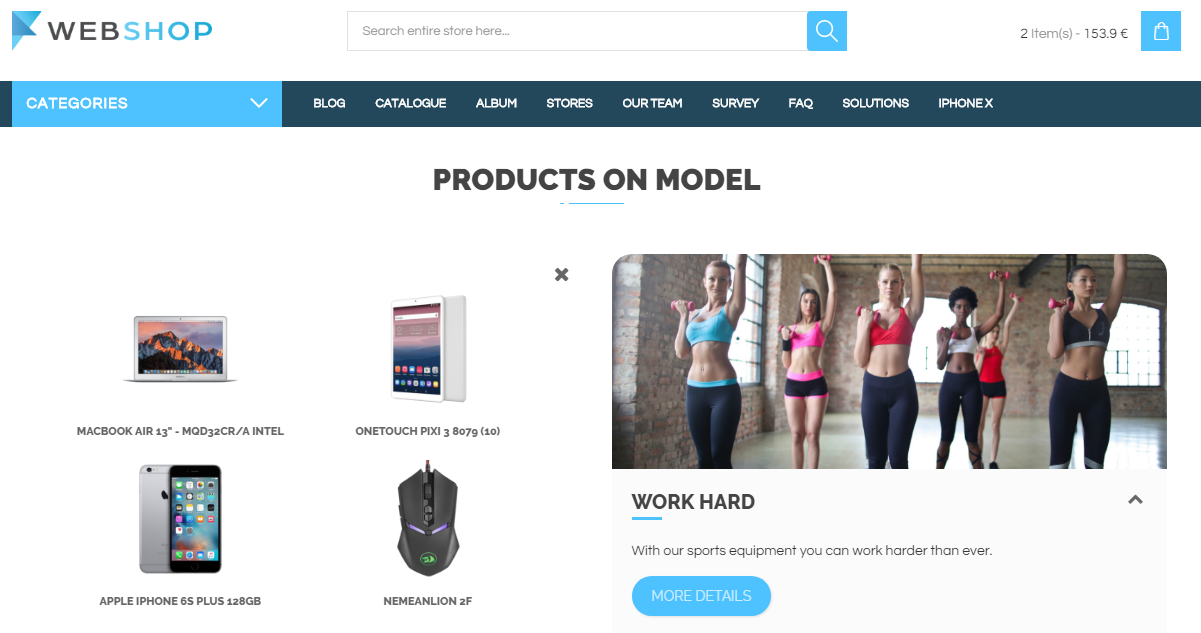
Customer opens particular model by clicking on its image or clicking on the button More details. Opened page contains image of the model, tags on the image model and individual products beneath the model image.
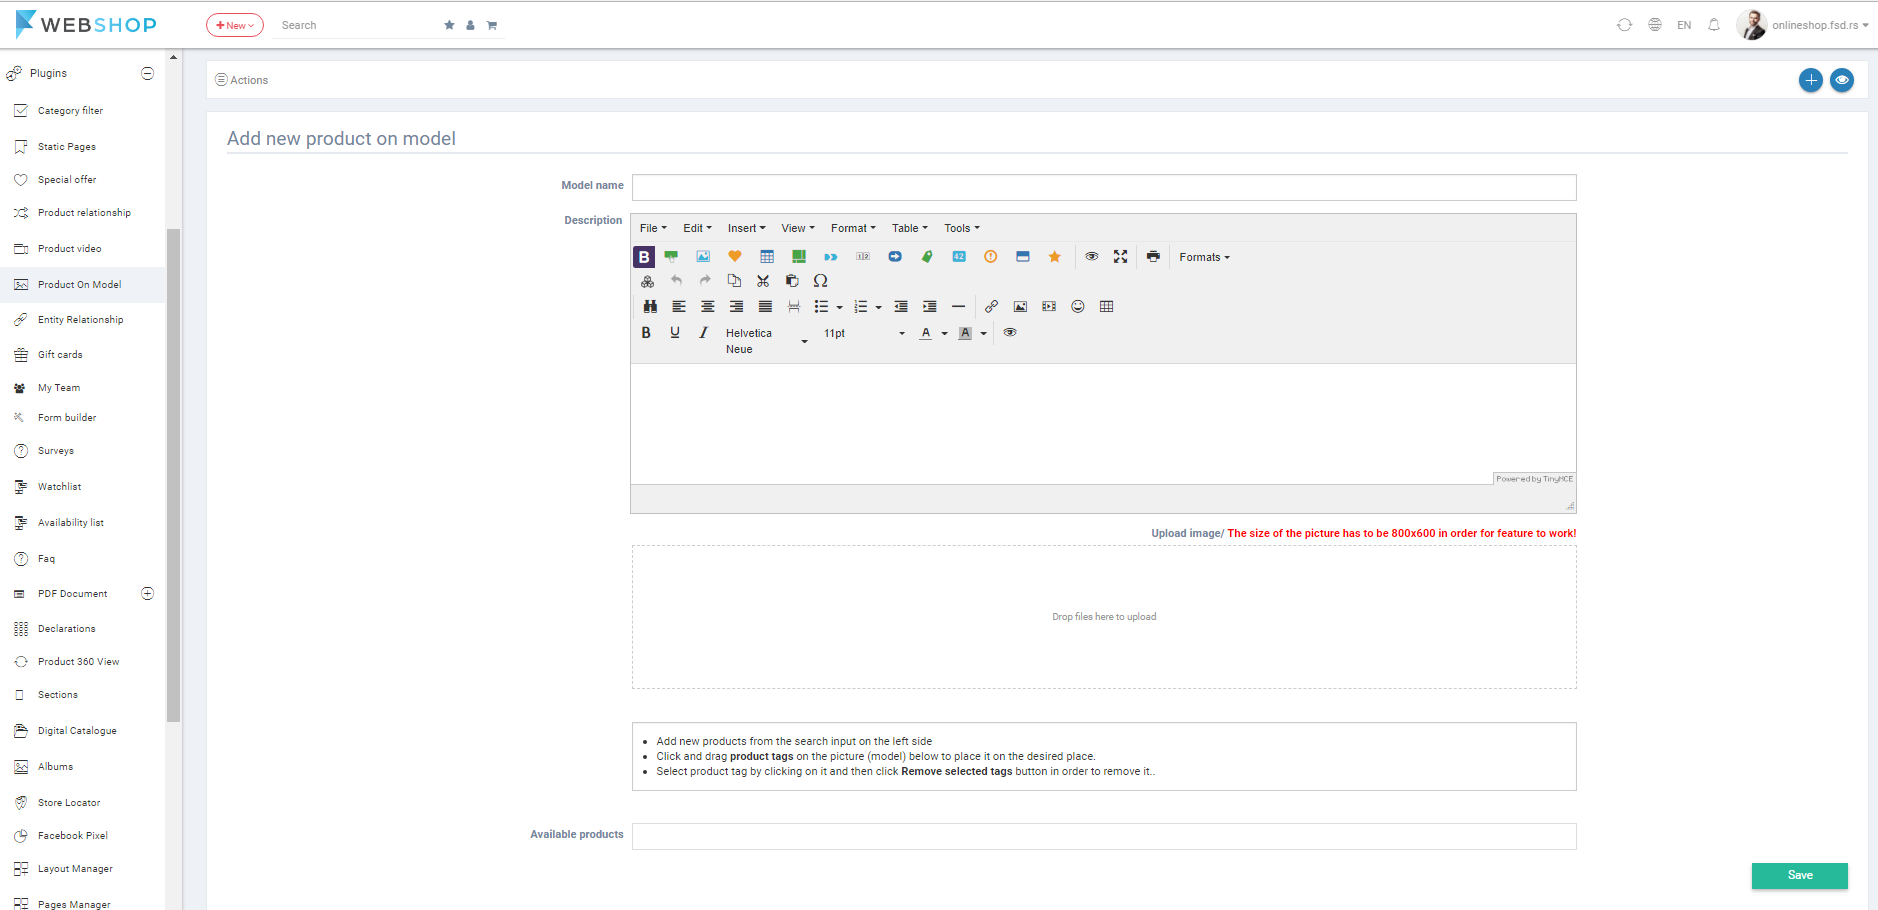
Add new product on model
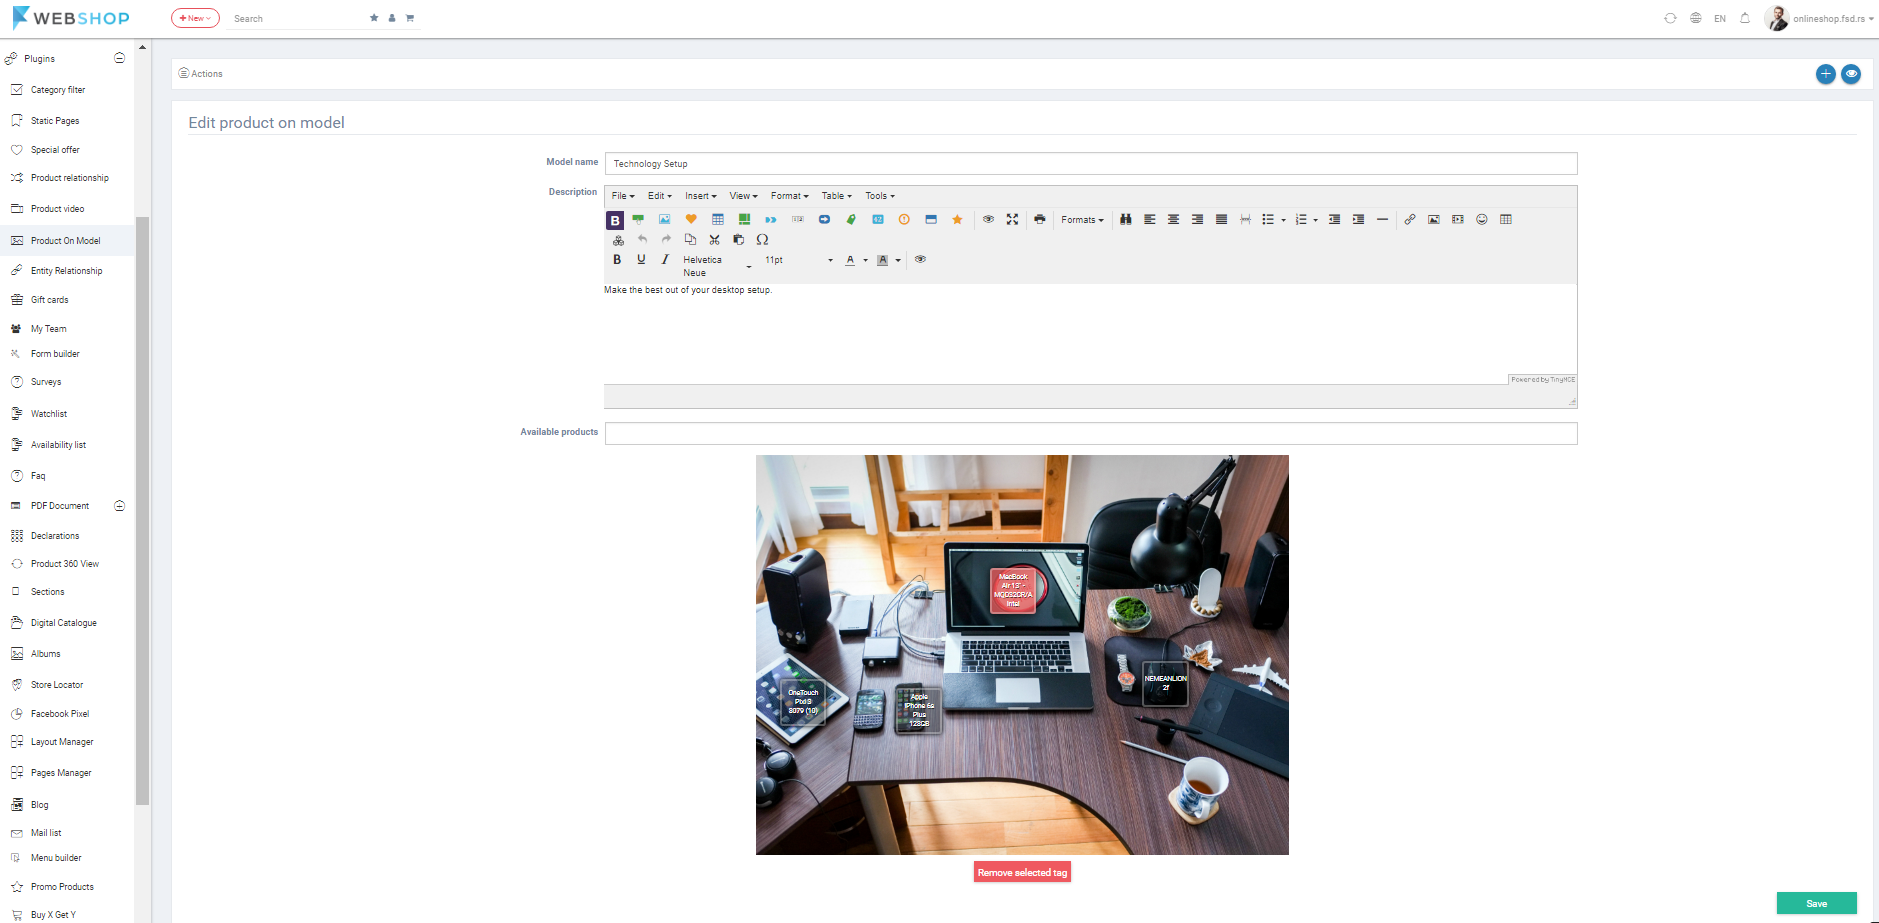
By clicking on menu Plugins/Product On Model/Add new, form for adding new products on preferred model opens. Required fields are Model name, Model description, Model image and Product tags.
After uploading new model image, Admin User can tag some of the products from the store that he/she wants to present. In field for searching products, admin user types parts of name or SKU of the product he/she want to tag and the list of available products shows. By selecting the right product, user creates a tag, that can be placed on any place od picture of the model that user wants. Also, Admin User can modify tag's width and height, depending on the model of the product.
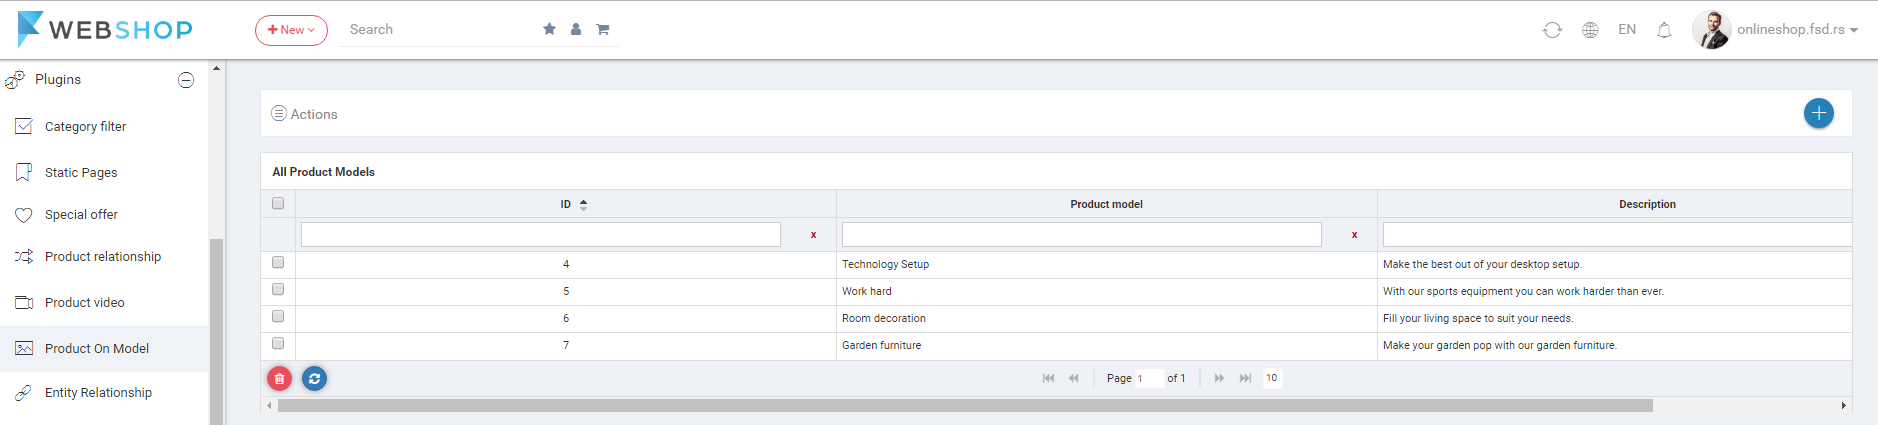
All product on models
By choosing menu Plugins/Product On Model/All, the list of all product models is shown. Admin has an option for advanced search and sorting by ID, Product Model and Description. Also, Admin User can choose how many product models he/she wants to view per page (10, 20, or 30 product models).
Edit product on model
Admin can edit product models by clicking on button for editing in the last column of the table for certain product model in the list.
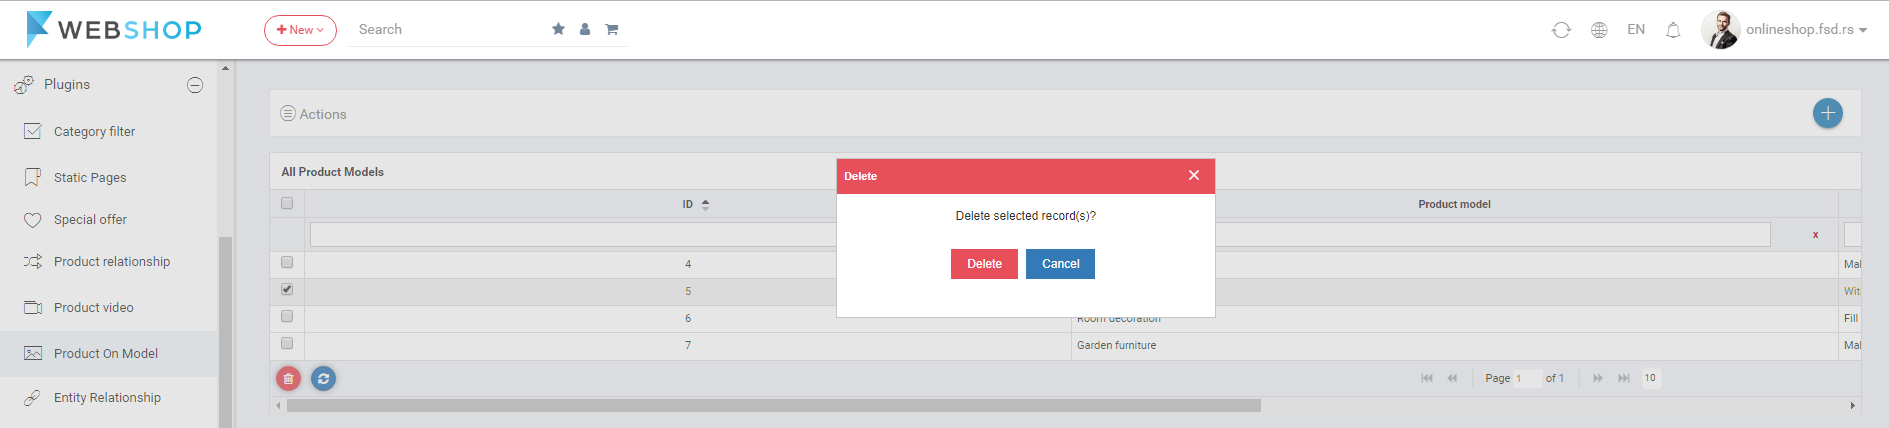
Delete product on model
Admin user can delete product models. It can be done one by one, but also by selecting multiple product models and clicking on button for delete in the bottom of the page.